
AGEGE BREAD
Agege Bread
My first time making agege bread. Here’s my recipe …
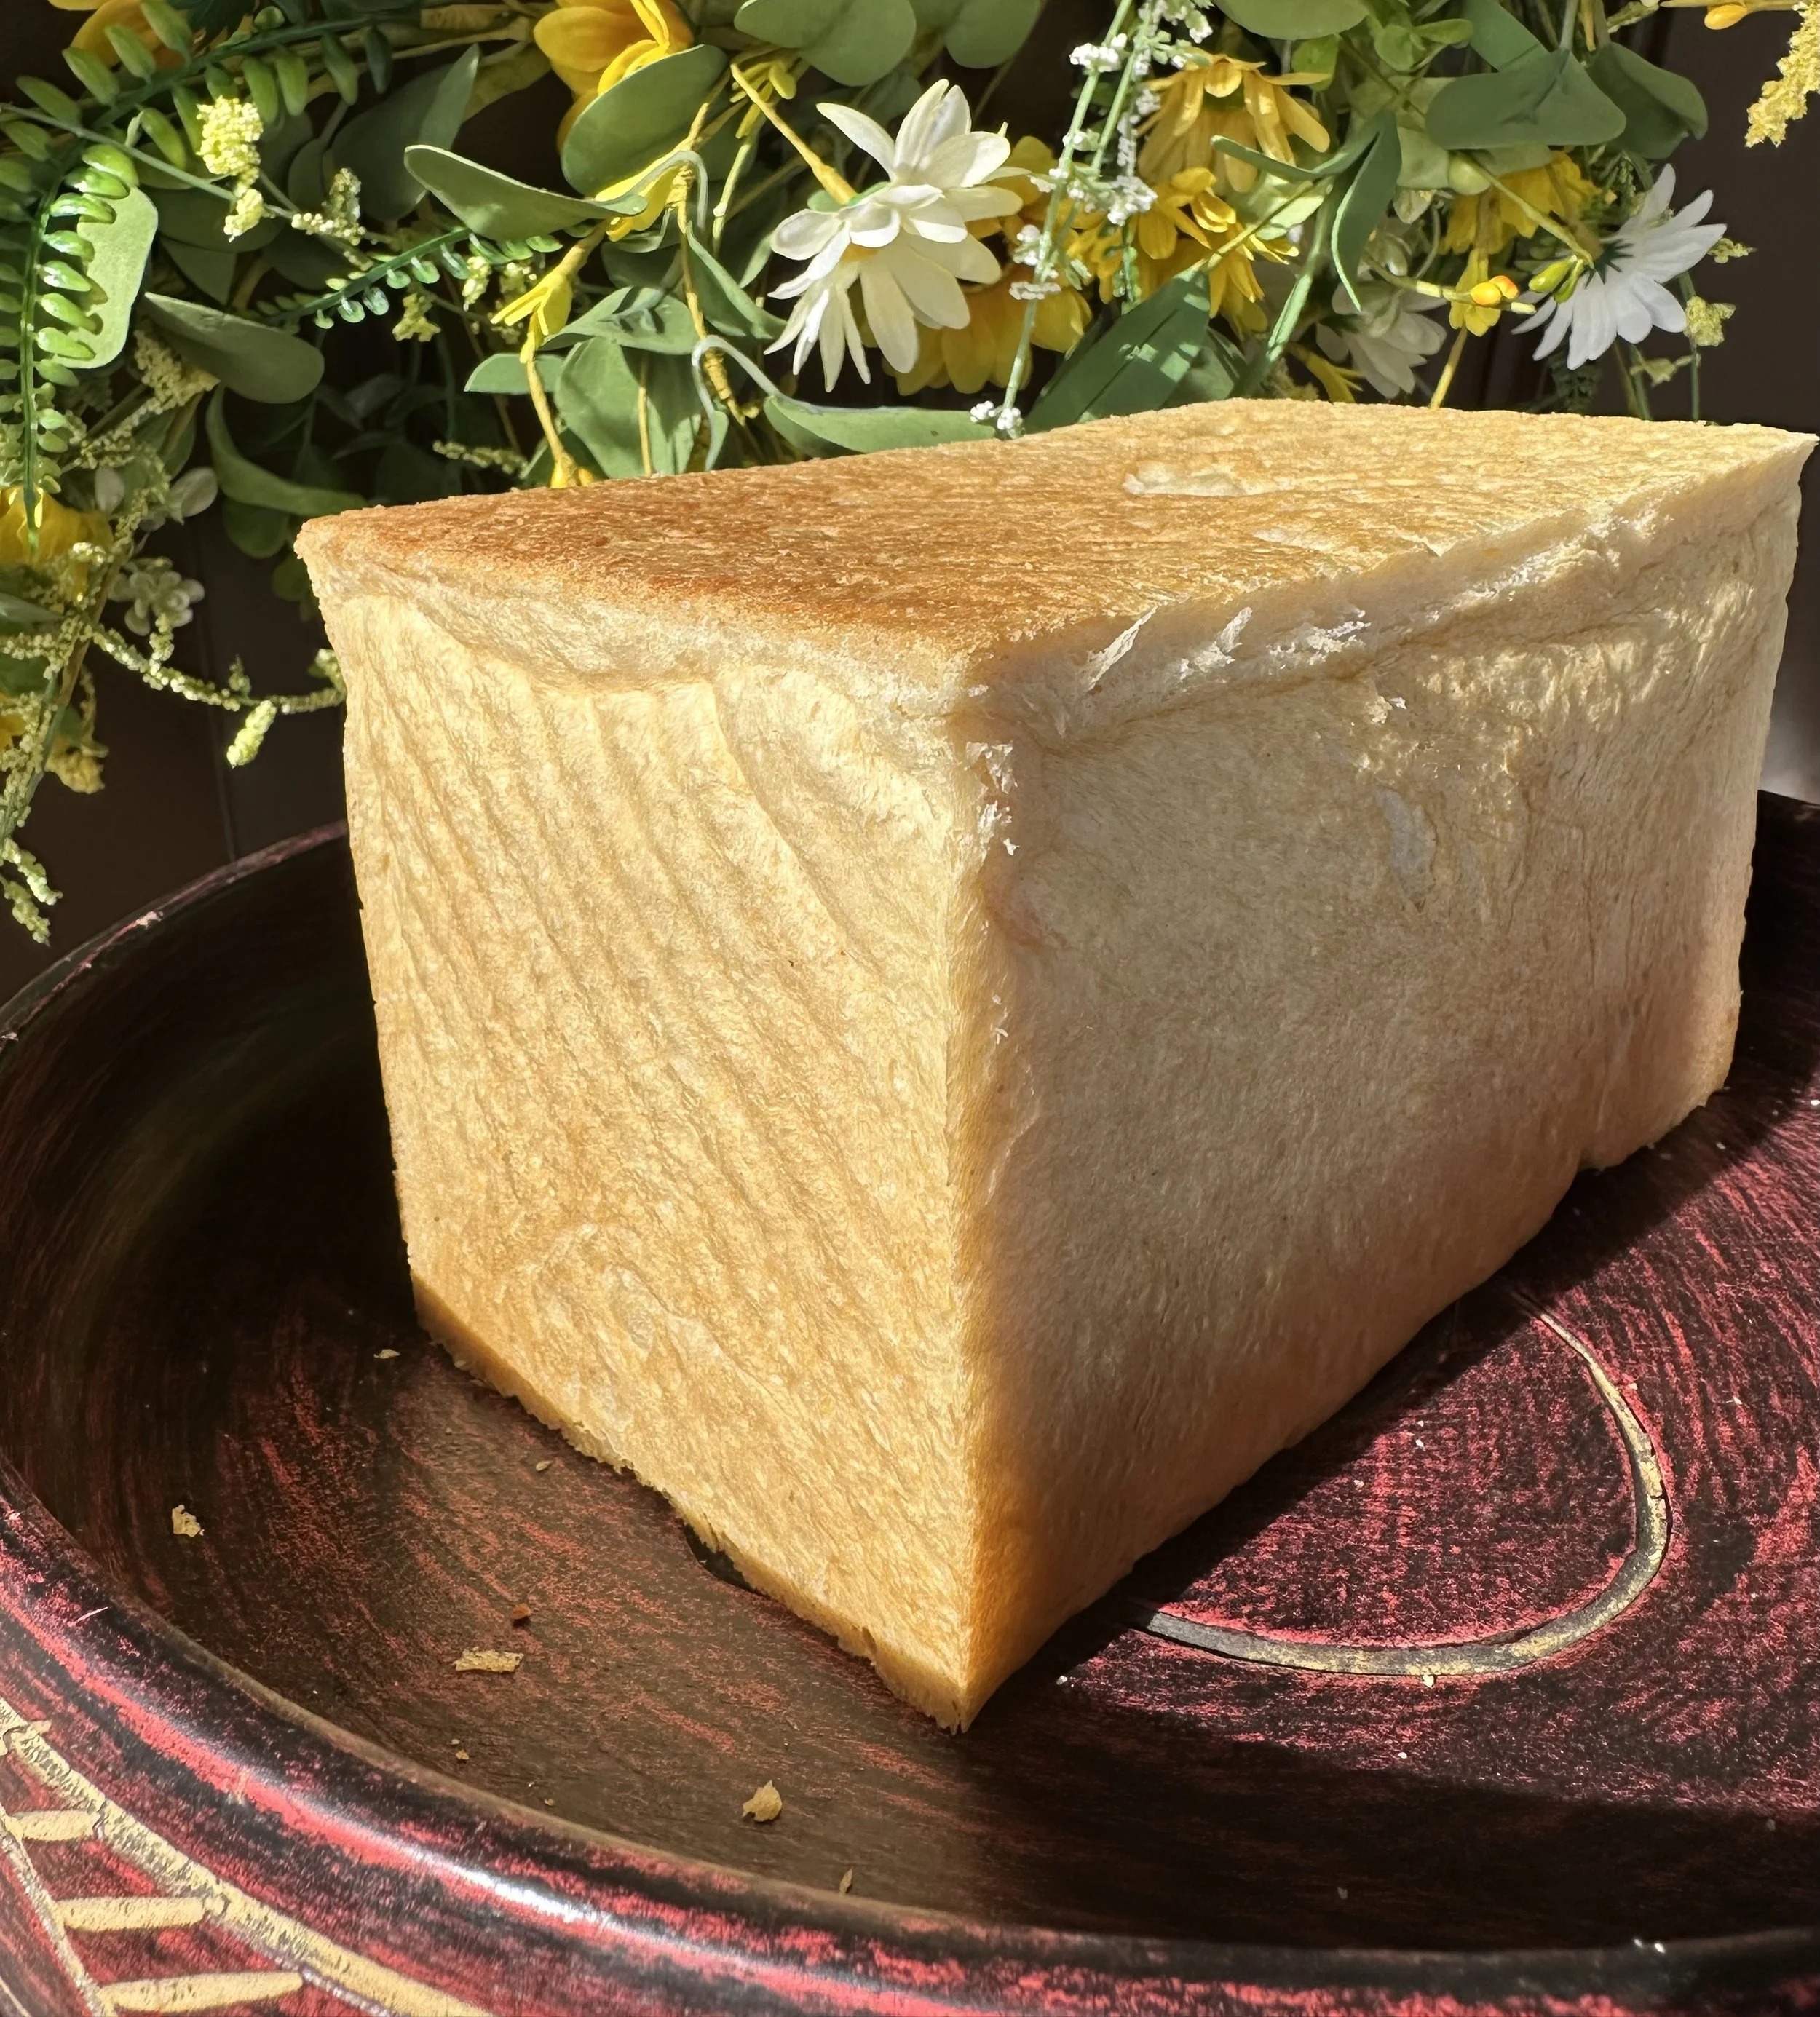
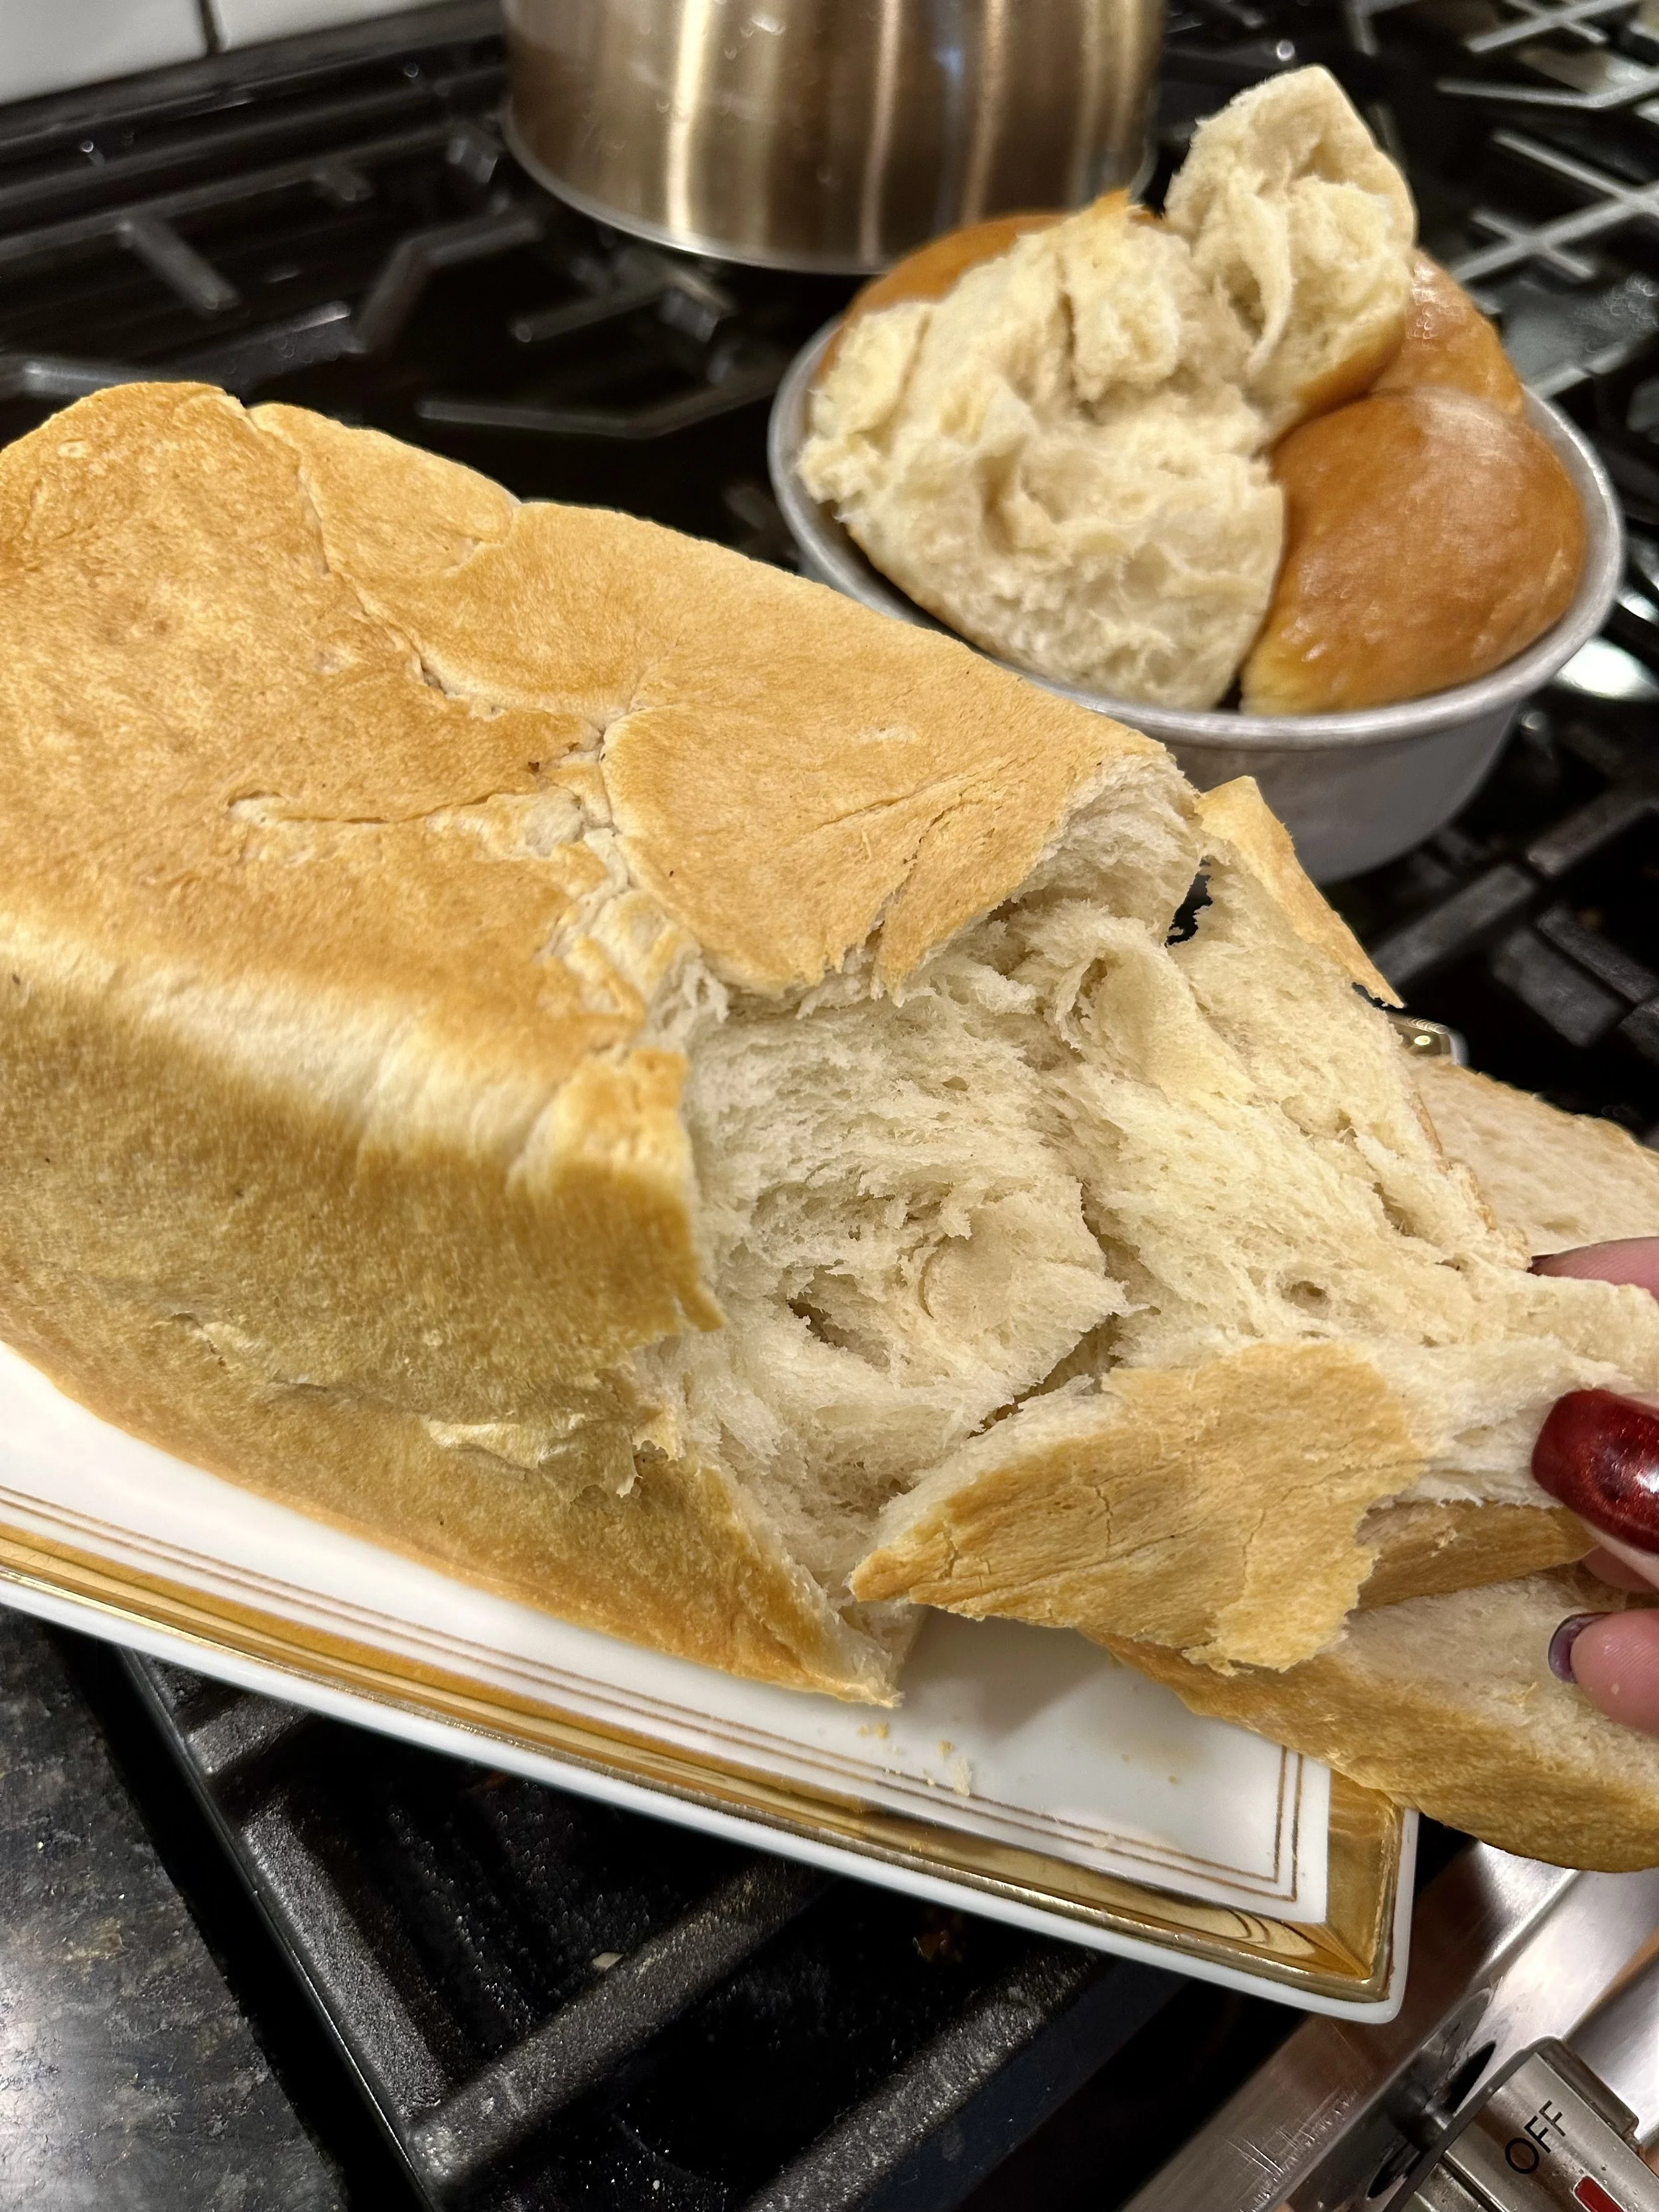
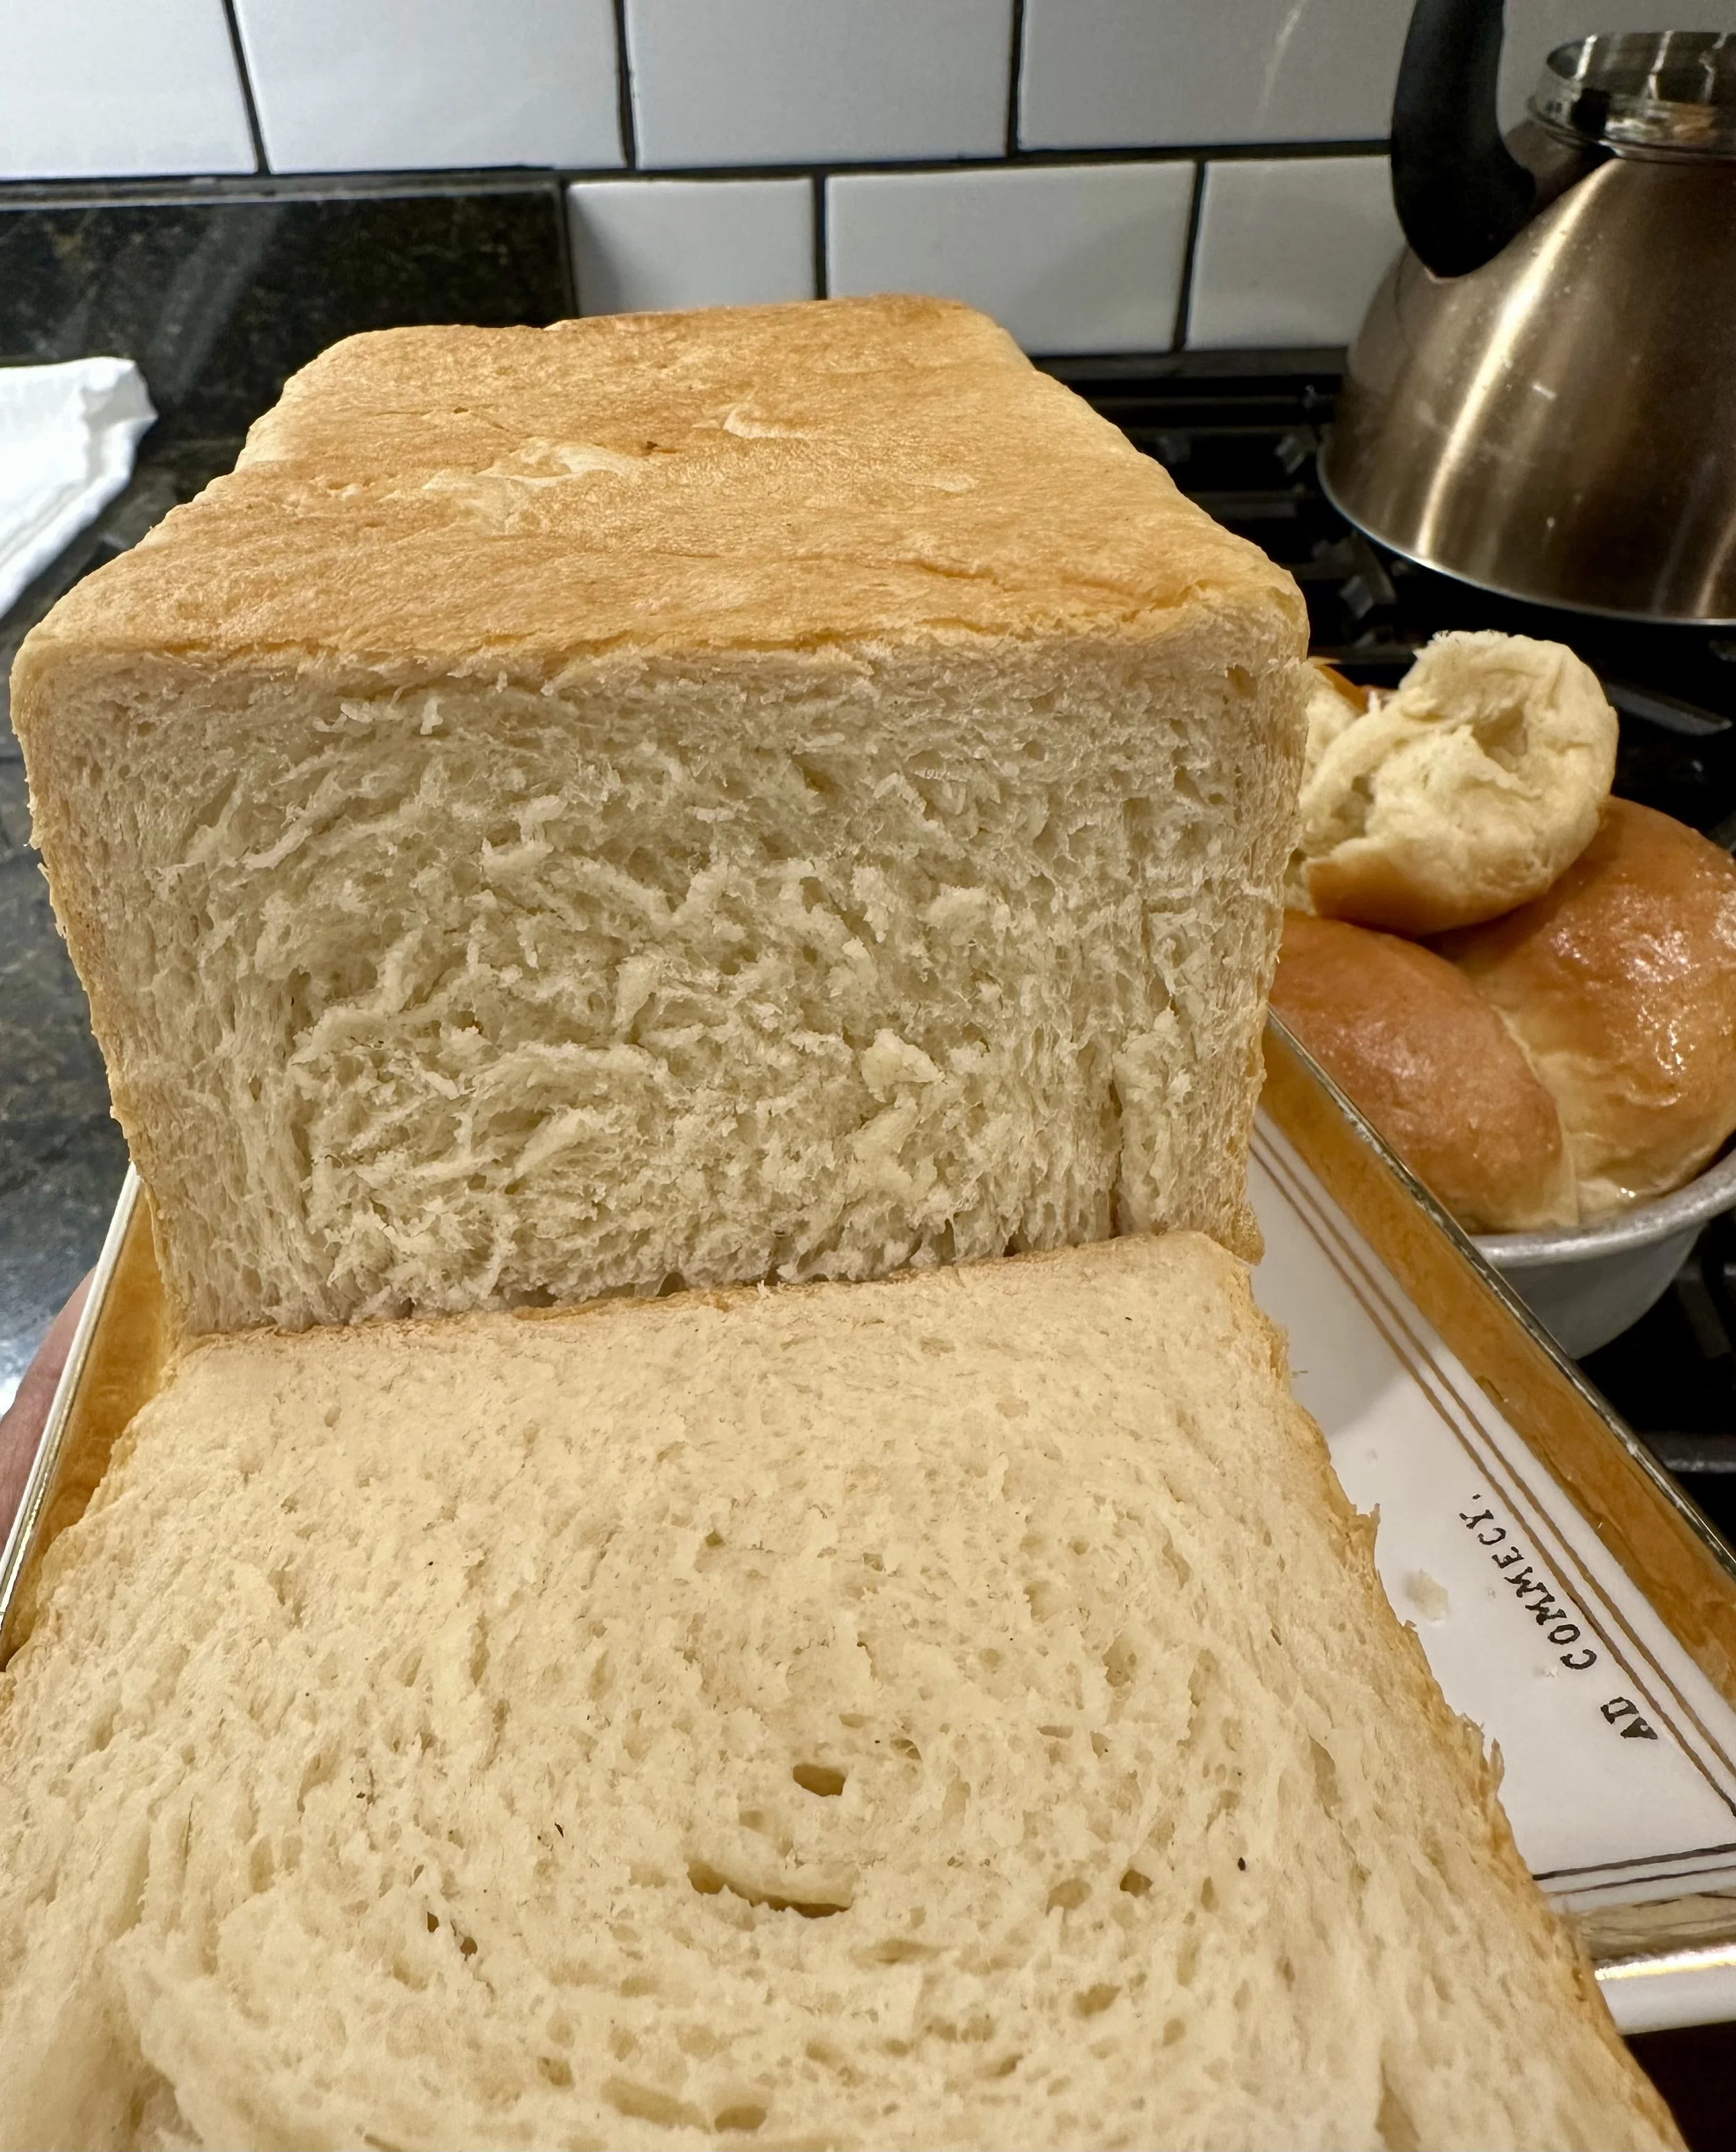
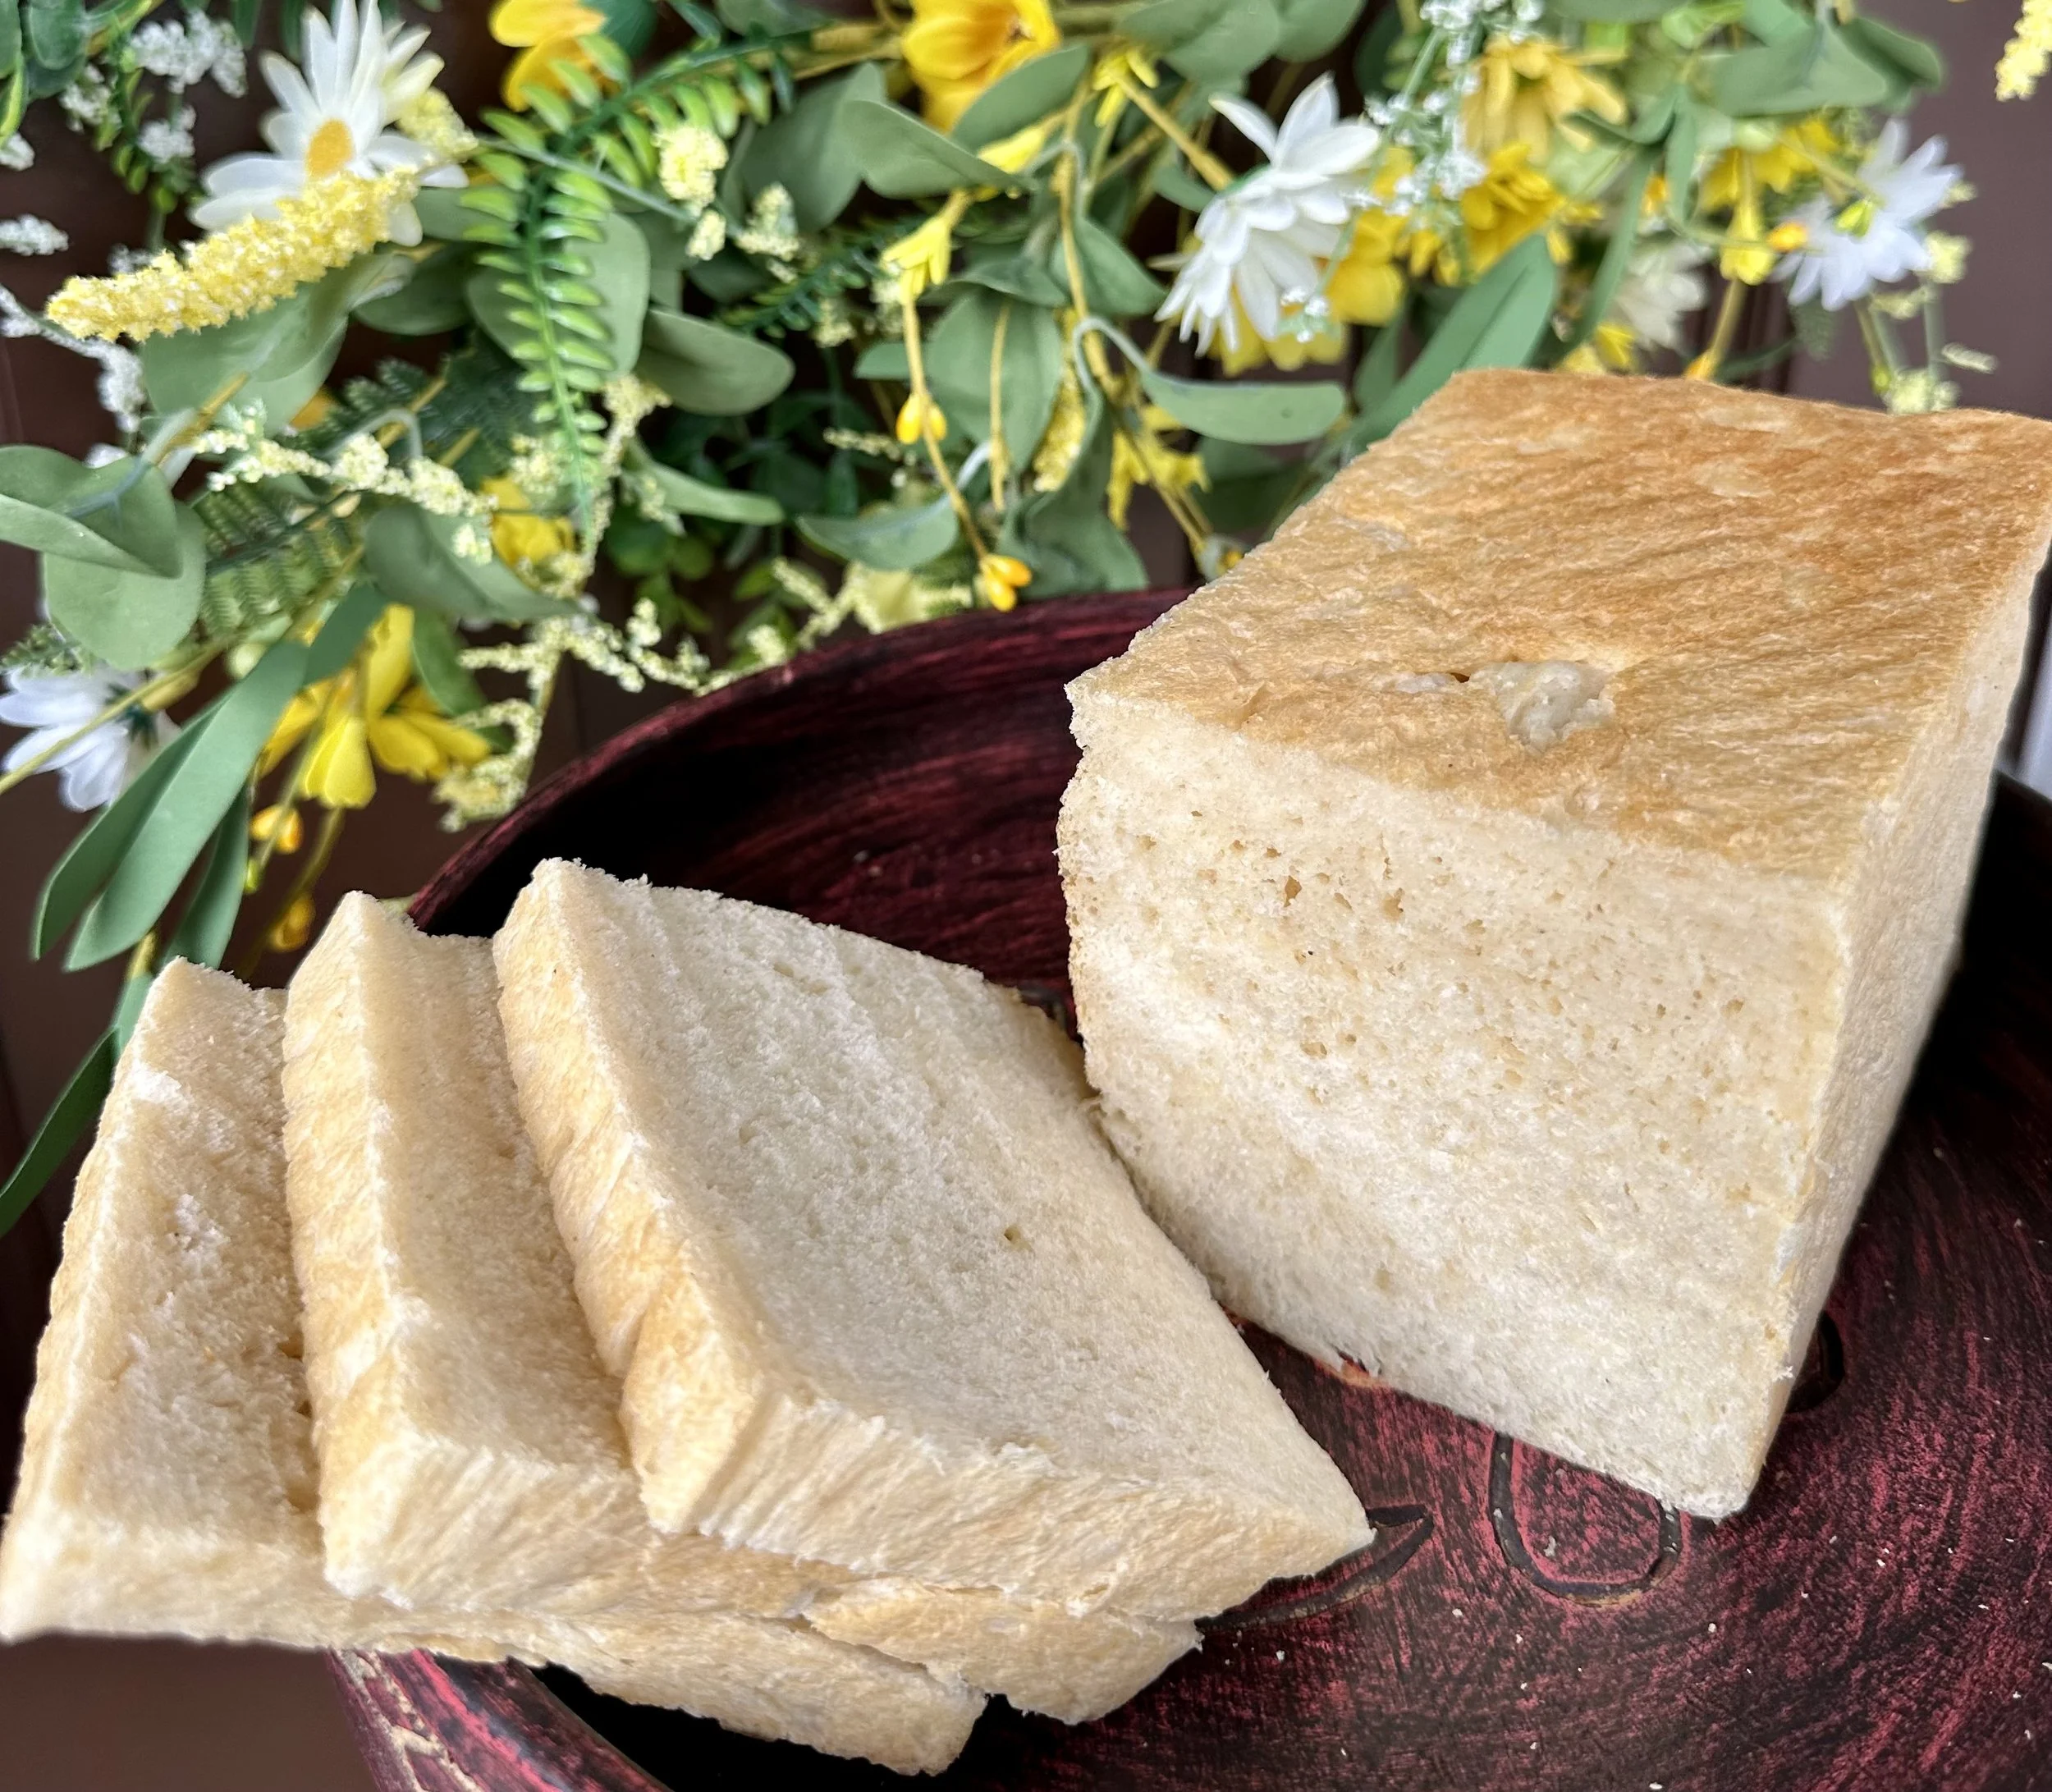
Traditional Agege bread has a tight, even crumb with a soft but chewy bite. When torn, it pulls into long, cottony strands and feels elastic and springy rather than airy or fluffy.
Yield: One 9x5 loaf pan plus a little extra for rolls or 16 x mini loaves/rolls (70g each)
PREP IT!
Scalded Flour:
½ cup (60 grams) Flour, bread
1 cup (236.56 grams) Water
Agege Bread:
4 1/3 cups (520 grams) Flour, bread
1/3 cup (67 grams) Granulated sugar
1 teaspoon Salt
¼ cup (32 grams) Nonfat dry milk
¼ teaspoon Nutmeg
¼ teaspoon Ascorbic acid (Vitamin C)
1 packet (7 grams) Instant yeast
2/3 cup (162.66 grams) Evaporated milk
1/3 cup (75.58 grams) Butter, salted, melted
1/3 cup (78.83 grams) Water (120°F - 130°F)
1 tablespoons Butter, salted (for brushing)
MAKE IT!
Prepare a 9x5 loaf pans by spreading a thin layer of oil or pan spray and setting aside.
For Scalded Flour:
In a small pot, using a spatula, slowly stir together water into the flour so lumps don’t form; kind of like if you were making gravy. Cook on low heat, being sure to stir consistently so the mixture doesn’t burn or stick. The mixture will thicken immediately.
Continue cooking until the mixture is the texture of soft fufu or loose mashed potatoes and it no longer tastes like raw flour. This will ensure all the starches in the flour have gelatinized.
Pour this mixture into a bowl and allow to cool, uncovered, to room temperature.
Tip: The gelatinized starch in the scalded flour helps to hold onto more liquid/moisture so it makes your bread last longer and it won’t dry out as quickly. It also helps to make the bread softer and acts like a dough conditioner. The ascorbic acid (vitamin C) helps to provide higher volume bread or bigger bread and it helps to provide a buffer for any mistakes that might be made in the bread making process, like over mixing, over proofing, working within the wrong temperature, etc.
For Agege Bread:
In a stand mixer bowl stir together the bread flour, all-purpose flour, sugar, salt, powdered milk, nutmeg, ascorbic acid, and yeast until evenly combined.
In a separate bowl, whisk together the scalded flour, milk, and melted butter until a smooth-ish paste forms. There will be a few lumps from the scalded flour. Add in water and stir.
Stir the wet ingredients into the dry and knead in the bowl until a sticky dough forms. Using the dough hook attachment on your stand mixer, continue to knead the dough on medium until the dough is no longer sticky, and becomes smooth and elastic. I kneaded for a total of 20-30 minutes, turning the mixer off to scrape down the dough every 5 minutes. If you’re kneading by hand, this will take longer. To knead by hand, reserve 1/3 cup of the flour. Using the reserved flour, flour a clean, flat surface and knead until the dough is as described above.
When you can take a piece of dough and stretch it until it’s translucent then the dough is done.
Form the dough into a ball.
Grease a separate bowl with a thin layer of oil and place the dough ball in the bowl. Cover with a damp kitchen towel or plastic wrap. Let it rise until it doubles in size, about an hour, in a warm place, like in the microwave or in an off oven with the light turned on.
Once doubled in size, punch down the dough and divide it into two portions, one large enough to fit in the 9 x 5 loaf pan and then any extra for the rolls.
Using a rolling pin, bottle of wine, or a tall glass, roll out the large piece of dough into a square, wide enough to fit in the loaf pan, and roll the square up into a log shape. Place the log in the loaf pan. Divide the extra dough into four pieces and rolling into balls. Place in a separate pan.
Cover both pans with a damp kitchen towel or plastic wrap. Let the dough rise again until it doubles in size, about an hour.
Preheat an oven for 350°F.
Once the dough doubles in size, bake the bread, on the middle oven rack, for 30 minutes. Mini loaves/rolls bake for 15 minutes.
Once bread is fully baked, remove and brush with butter.
Remove the bread from the pans and allowed to cool on a cooling rack.
Enjoy!! Try it with Akara!
Tip: This recipe has been tested to produce a traditional Agege bread texture, which depends more on strong gluten development than on low hydration alone. While the total liquid may appear high on paper, not all liquid functions as free water in the dough. Evaporated milk contains proteins, sugars, and fats; scalded flour binds water through starch gelatinization; and sugar, milk powder, and fat further limit free hydration. As a result, the dough behaves more like a moderately hydrated enriched dough than a wet lean dough.
Through testing, I found that higher-protein flour, long mechanical mixing, and firm degassing create the classic tight, chewy crumb. Using lower-protein flour and/or reducing hydration will yield a softer, lighter crumb with fewer holes, but it will reduce elasticity and chew and move the bread away from a traditional Agege texture.
For the Softer Home-Style Variation
For a softer, lighter loaf with less chew, use all-purpose flour and reduce the added water slightly; expect a more tender crumb rather than the traditional elastic pull of Agege bread. Replace the flour ratio in the recipe for the ratio below:
3 cups (360 grams) Flour, bread
1 1/3cup (160 grams) Flour, all purpose
Agege Bread